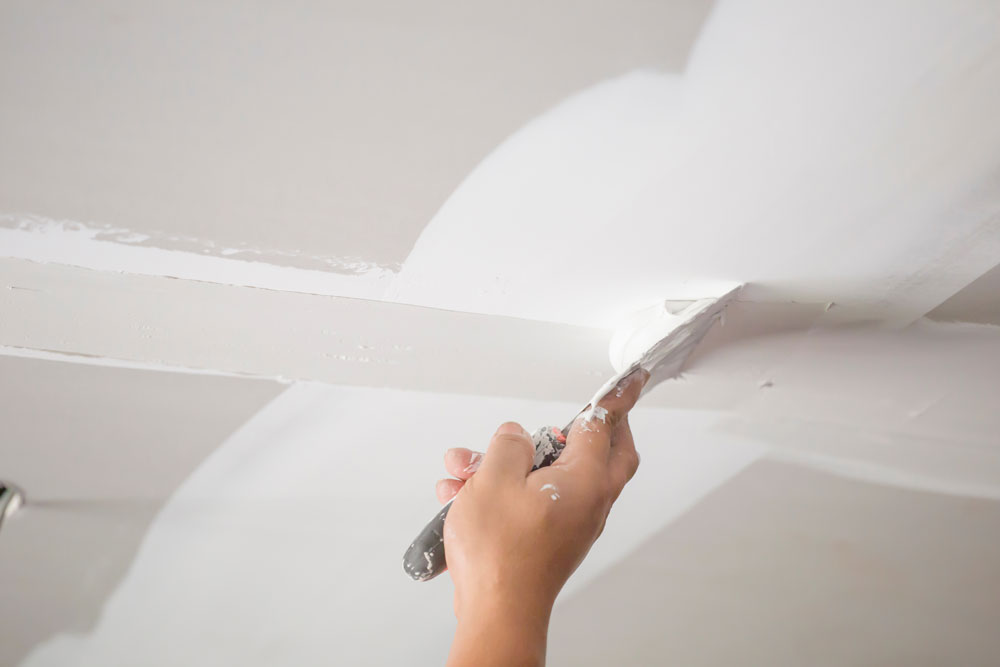
Ceiling drywall repair is different from patching a wall. Ceilings are harder to access, more difficult to sand, and easier to notice when the texture or paint does not blend. A small ceiling crack, nail pop, water stain, or hole can stand out every time light moves across the room.
Mighty White Ceilings & Walls helps homeowners in Ventura, CA with ceiling drywall repair, ceiling drywall patch work, texture matching, and clean finishing for damaged ceilings. If you are searching for drywall ceiling repair near me or ceiling repair near me, this guide explains what may be causing the problem and how local pros repair it safely.
Get Drywall Repair in Ventura, CA Today!
Why Ceiling Drywall Repairs Need Extra Care
Ceiling repairs are more challenging than wall repairs because the work is overhead and the finished surface is highly visible. Even a small patch can show if the joint compound is too thick, the sanding is uneven, or the texture match is slightly off.
Ceilings also tend to reveal deeper issues. A stain may point to a roof leak or plumbing problem. A sag may mean the drywall has lost support. A crack may be caused by settling, seasonal movement, or a loose seam. Before patching ceiling drywall, the cause of the damage should be understood.
For Ventura homes, ceiling problems can come from coastal moisture, older housing stock, attic ventilation issues, roof leaks during rainy periods, bathroom humidity, and normal movement over time. That local context matters when deciding whether a ceiling drywall patch is enough or whether a larger section needs replacement.
Common Ceiling Drywall Problems in Ventura Homes
Ceiling drywall can fail in several ways. Some issues are cosmetic. Others need a closer look before repair begins.
- Ceiling sag: Sagging drywall can happen when panels loosen, absorb moisture, or lose support.
- Cracks: Ceiling cracks may come from settling, stress, loose tape, or movement along drywall seams.
- Holes: Holes can come from plumbing access, electrical work, impact damage, light fixture changes, or attic work.
- Nail pops: Nail pops appear as small bumps or circles when fasteners move or drywall shifts slightly.
- Water stains: Brown or yellow stains often point to roof leaks, plumbing leaks, bathroom moisture, or past water intrusion.
- Loose texture: Old ceiling texture can flake, bubble, or separate after moisture, age, or previous repairs.
- Visible old patches: Previous patching may show if it was not feathered, sanded, primed, or texture matched correctly.
A good ceiling repair starts with a damage assessment, not just a patch. The repair method depends on whether the drywall is still solid, dry, and properly supported.
Ceiling Sag: When It Is More Than Cosmetic
Ceiling sag should always be taken seriously. A slight uneven area may come from poor installation, old repairs, or framing movement. A larger sag can mean the drywall has absorbed moisture or is separating from the ceiling joists.
If the ceiling feels soft, looks bowed, has spreading stains, or appears to be pulling away, it may not be safe to simply cover the area with joint compound. The damaged section may need to be removed and replaced.
Common causes of ceiling sag include:
- Roof leaks
- Plumbing leaks above the ceiling
- Bathroom or laundry moisture
- Loose fasteners
- Old or poorly installed drywall
- Insulation weight after moisture exposure
- Previous repairs that did not restore support
For safety, avoid poking, cutting, or sanding a sagging ceiling until you know what is behind it. If the drywall is weakened, disturbing the area can cause more material to come loose.
Repairing Ceiling Cracks
Ceiling cracks can form along seams, near corners, around attic access openings, or across large ceiling spans. In Ventura homes, cracks may be tied to seasonal movement, settling, older drywall seams, or minor seismic movement over time.
Professional ceiling drywall repair usually involves more than filling the crack. If the crack follows a seam, the repair may require drywall tape repair. Loose tape and old compound may need to be removed before new tape and mud are applied.
A typical ceiling crack repair may include:
- Inspecting the crack and surrounding drywall
- Removing loose tape, paint, or compound
- Reinforcing the seam with tape and joint compound
- Applying thin coats of compound and feathering the repair
- Sanding carefully to avoid creating flat spots
- Matching the surrounding ceiling texture
- Priming before paint
The goal is a smooth, stable repair that blends into the ceiling instead of leaving a visible line or patch.
Fixing Ceiling Holes
Ceiling holes often need stronger support than small wall holes. A hole from a light fixture, plumbing repair, roof leak access point, or accidental damage may need backing, new drywall, tape, compound, texture, and paint preparation.
A ceiling drywall patch must be secure because gravity works against the repair. If the patch is not properly supported, it can crack, sag, or separate later.
For small holes, a mesh patch may be enough if the surrounding drywall is firm. For larger openings, the repair usually requires cutting a clean section, adding backing, installing a new piece of drywall, taping the seams, finishing with joint compound, sanding, and matching texture.
If the hole was created to access a leak or mechanical repair, the ceiling should not be closed until the issue above the drywall has been fixed.
What Causes Nail Pops in Ceilings?
Nail pops look like small raised spots, circles, or cracks where a fastener has moved. They are common in ceilings because drywall can shift slightly as the home settles or as wood framing expands and contracts.
A proper nail pop repair is not just pushing the bump flat. The loose fastener may need to be secured, the area may need additional screws, and the surface may need joint compound, sanding, texture, primer, and paint.
If there are many nail pops across one ceiling, it may be a sign of movement, installation issues, or moisture. A professional can inspect whether the problem is isolated or part of a larger ceiling repair.
Water Stains on Ceiling Drywall
Water stains are one of the most common reasons homeowners search for ceiling repair near me. A stain may look small, but the drywall above it may be soft, stained, or weakened.
Before any cosmetic repair, the water source should be found and fixed. Common causes include:
- Roof leaks
- Leaking plumbing lines
- Bathroom leaks
- Overflowed tubs or sinks
- HVAC condensation
- Moisture around vents or attic areas
Once the source is fixed and the area is dry, the repair depends on the condition of the drywall. A firm ceiling with a minor stain may need stain-blocking primer, texture blending, and paint. Soft, sagging, bubbled, or crumbling drywall usually needs replacement.
Why Texture Match Is So Important on Ceilings
Texture match is one of the hardest parts of ceiling drywall repair. A ceiling patch that is structurally sound can still look unfinished if the texture is too smooth, too heavy, too sharp, or applied in a different pattern.
Ventura homes may have several ceiling finishes, including smooth drywall, orange peel, knockdown, or older hand-applied texture. Matching these finishes takes patience and experience.
Ceiling texture is especially noticeable because light crosses the surface at low angles. A patch can look fine from one side of the room and obvious from another. That is why patching ceiling drywall should include proper feathering, texture blending, primer, and paint planning.
Safety Matters With Ceiling Drywall Repair
Ceiling work comes with safety concerns that do not always apply to wall patching. The repair may require ladders, overhead sanding, dust control, eye protection, and careful handling of loose drywall.
Safety becomes even more important when the ceiling has sagging drywall, water stains, electrical fixtures, attic access, or damage near recessed lighting. Cutting into a ceiling without checking the area first can expose insulation, wiring, plumbing, or weakened material.
For larger ceiling drywall repair, hiring a professional helps reduce the risk of falling, damaging the ceiling further, or closing up a problem that should be corrected first.
DIY vs Professional Ceiling Drywall Repair
Some small cosmetic ceiling issues may be DIY-friendly, but most ceiling repairs are harder than they look. Working overhead makes it difficult to apply joint compound evenly, sand without gouging, and blend texture without creating a visible patch.
| Ceiling Issue | DIY-Friendly? | Best Option |
|---|---|---|
| Single tiny nail pop | Sometimes | Secure, patch, sand, prime, and paint |
| Small cosmetic crack | Sometimes | Assess first, then tape and mud if needed |
| Large crack along a seam | Usually no | Professional drywall tape repair |
| Ceiling hole | Usually no | Professional ceiling drywall patch |
| Water stain | No until source is fixed | Find leak, dry area, then repair |
| Ceiling sag | No | Professional inspection and repair |
| Texture matching | Difficult | Professional blending for best results |
If the repair is in a main living area, bedroom, kitchen, hallway, or rental property, professional repair usually creates a cleaner finished result.
How Ventura Pros Repair Ceiling Drywall
A professional ceiling drywall repair starts by identifying the cause of the damage. The repair method changes depending on whether the ceiling has a crack, hole, water stain, sag, nail pop, or failed texture.
The process may include:
- Damage assessment: Checking the ceiling surface, drywall stability, moisture signs, and texture.
- Preparation: Protecting floors, furniture, and nearby surfaces from dust and compound.
- Removal: Cutting away damaged drywall, loose tape, or unstable material when needed.
- Support: Adding backing or securing loose drywall before patching.
- Patching: Installing a ceiling drywall patch or repairing the seam with tape and mud.
- Finishing: Applying thin coats of joint compound and feathering the edges.
- Sanding: Smoothing the repair without creating dips or ridges.
- Texture matching: Blending the patch into the surrounding ceiling finish.
- Priming: Preparing the repair for paint and reducing flashing.
Each step helps create a stronger repair and a cleaner ceiling finish.
When a Ceiling Patch Is Enough
A ceiling drywall patch may be enough when the damaged area is small, dry, and surrounded by stable drywall. This can include small holes from fixture changes, minor access openings, or isolated impact damage.
Patching is usually a good option when:
- The drywall around the damage is firm.
- There is no active leak.
- The ceiling is not sagging.
- The opening can be properly supported.
- The texture can be blended into the surrounding ceiling.
A patch may not be enough if the drywall is soft, stained, sagging, or cracked across a wide area. In those cases, replacing a larger section may be the better repair.
When Ceiling Drywall Should Be Replaced
Replacement is usually the better choice when the drywall has lost strength. Covering weak drywall with compound or texture will not solve the problem underneath.
Ceiling drywall may need replacement when:
- The area is sagging or bowed.
- The drywall is soft from water damage.
- There are recurring stains after past repairs.
- The ceiling is crumbling or separating.
- The damaged area is too large for a stable patch.
- There are multiple cracks in one section.
Replacing the damaged piece gives the repair a stable surface. After that, the new drywall can be taped, finished, sanded, texture matched, primed, and prepared for paint.
Local Ceiling Repair for Ventura Homes
Mighty White Ceilings & Walls understands the ceiling issues common in Ventura homes, from older drywall seams and coastal moisture to roof leak stains, ceiling cracks, and texture matching challenges. Local homes can vary widely in finish style, ceiling height, and repair history, so the best repair depends on the actual condition of the ceiling.
Whether you are dealing with a small ceiling drywall patch or a larger repair after a leak, the goal is the same: a safe repair, a stable surface, and a texture match that blends as cleanly as possible.
[Link “ceiling drywall patching in Ventura” to the ceiling-patching section of the drywall repair pillar page]
Frequently Asked Questions
What causes ceiling drywall to sag?
Ceiling sag can be caused by water damage, loose fasteners, poor installation, framing movement, insulation weight, or drywall that has weakened over time. Sagging drywall should be inspected before patching because it may need replacement instead of a surface repair.
Can a ceiling drywall patch fix a hole?
Yes, a ceiling drywall patch can fix a hole if the surrounding drywall is firm and the patch is properly supported. Larger holes usually need backing, new drywall, tape, joint compound, sanding, texture match, primer, and paint preparation.
Should I repair a ceiling water stain myself?
You should not repair a ceiling water stain until the moisture source is fixed and the drywall is dry. If the ceiling is soft, sagging, bubbled, or crumbling, it may need replacement instead of a simple stain-covering repair.
Why is ceiling drywall repair harder than wall repair?
Ceiling drywall repair is harder because the work is overhead, sanding is more difficult, and texture matching is more visible under natural light. A ceiling patch can stand out if it is not feathered, sanded, textured, and primed correctly.
When should I search for drywall ceiling repair near me?
You should search for drywall ceiling repair near me when you have ceiling sag, cracks, holes, nail pops, water stains, loose texture, or a visible old patch that needs professional repair. A local Ventura pro can inspect the damage and recommend patching or replacement.
Call Ventura’s Ceiling Drywall Repair Pros
Ceiling damage should not be ignored, especially when you see sagging, water stains, cracks, holes, or loose texture. Mighty White Ceilings & Walls provides ceiling drywall repair in Ventura, CA with careful patching, sanding, texture matching, and clean finishing.
For safe, professional ceiling patching that blends with your home, call Ventura’s drywall pros today.